You Can Just Do Hardware
How I built a real IoT product from scratch as an intern, and what I learned about hardware, software, and myself.
I used to think I was a software person only. I knew how to build software and turn almost any idea into code, but I had no clue how to transform that code into something you could actually touch.
Four months ago, I visited an event at my university where one team presented a wearable device they had built, a scanner that could track your body metrics daily. My first thought was: "Wow, that looks like something hard to build." And honestly? I hate having that thought.
I genuinely believe things only seem hard when you lack the necessary understanding, and that's something you can always fix. So I decided to fix it. I applied for an internship in Internet of Things to dive deep and figure things out for myself.

The First Two Months: Learning by Doing
The internship started with eight weeks of intense weekly challenges:
- We built a smart LED lighting system with custom effects and remote control.
- We wired up sensors to collect environmental data like temperature, humidity, and air quality, and streamed it to a local dashboard.
- And in one of the most memorable weeks, we implemented a real-time motion-detection system using ultrasonic sensors and IR modules to simulate security alarms.
The very first week, I had to dive straight into C and learn how to build and flash firmware onto ESP32 microcontrollers, which is something I had zero experience with before. I spent that week sleeping very little and reading documentation a lot, racing to learn the basics and submit the assignment in time.
And weirdly? I didn't mind the chaos. It wasn't just fun. It was deeply satisfying. Learning and applying knowledge in practice, at the same time, lit up something in me I hadn't felt in a while.
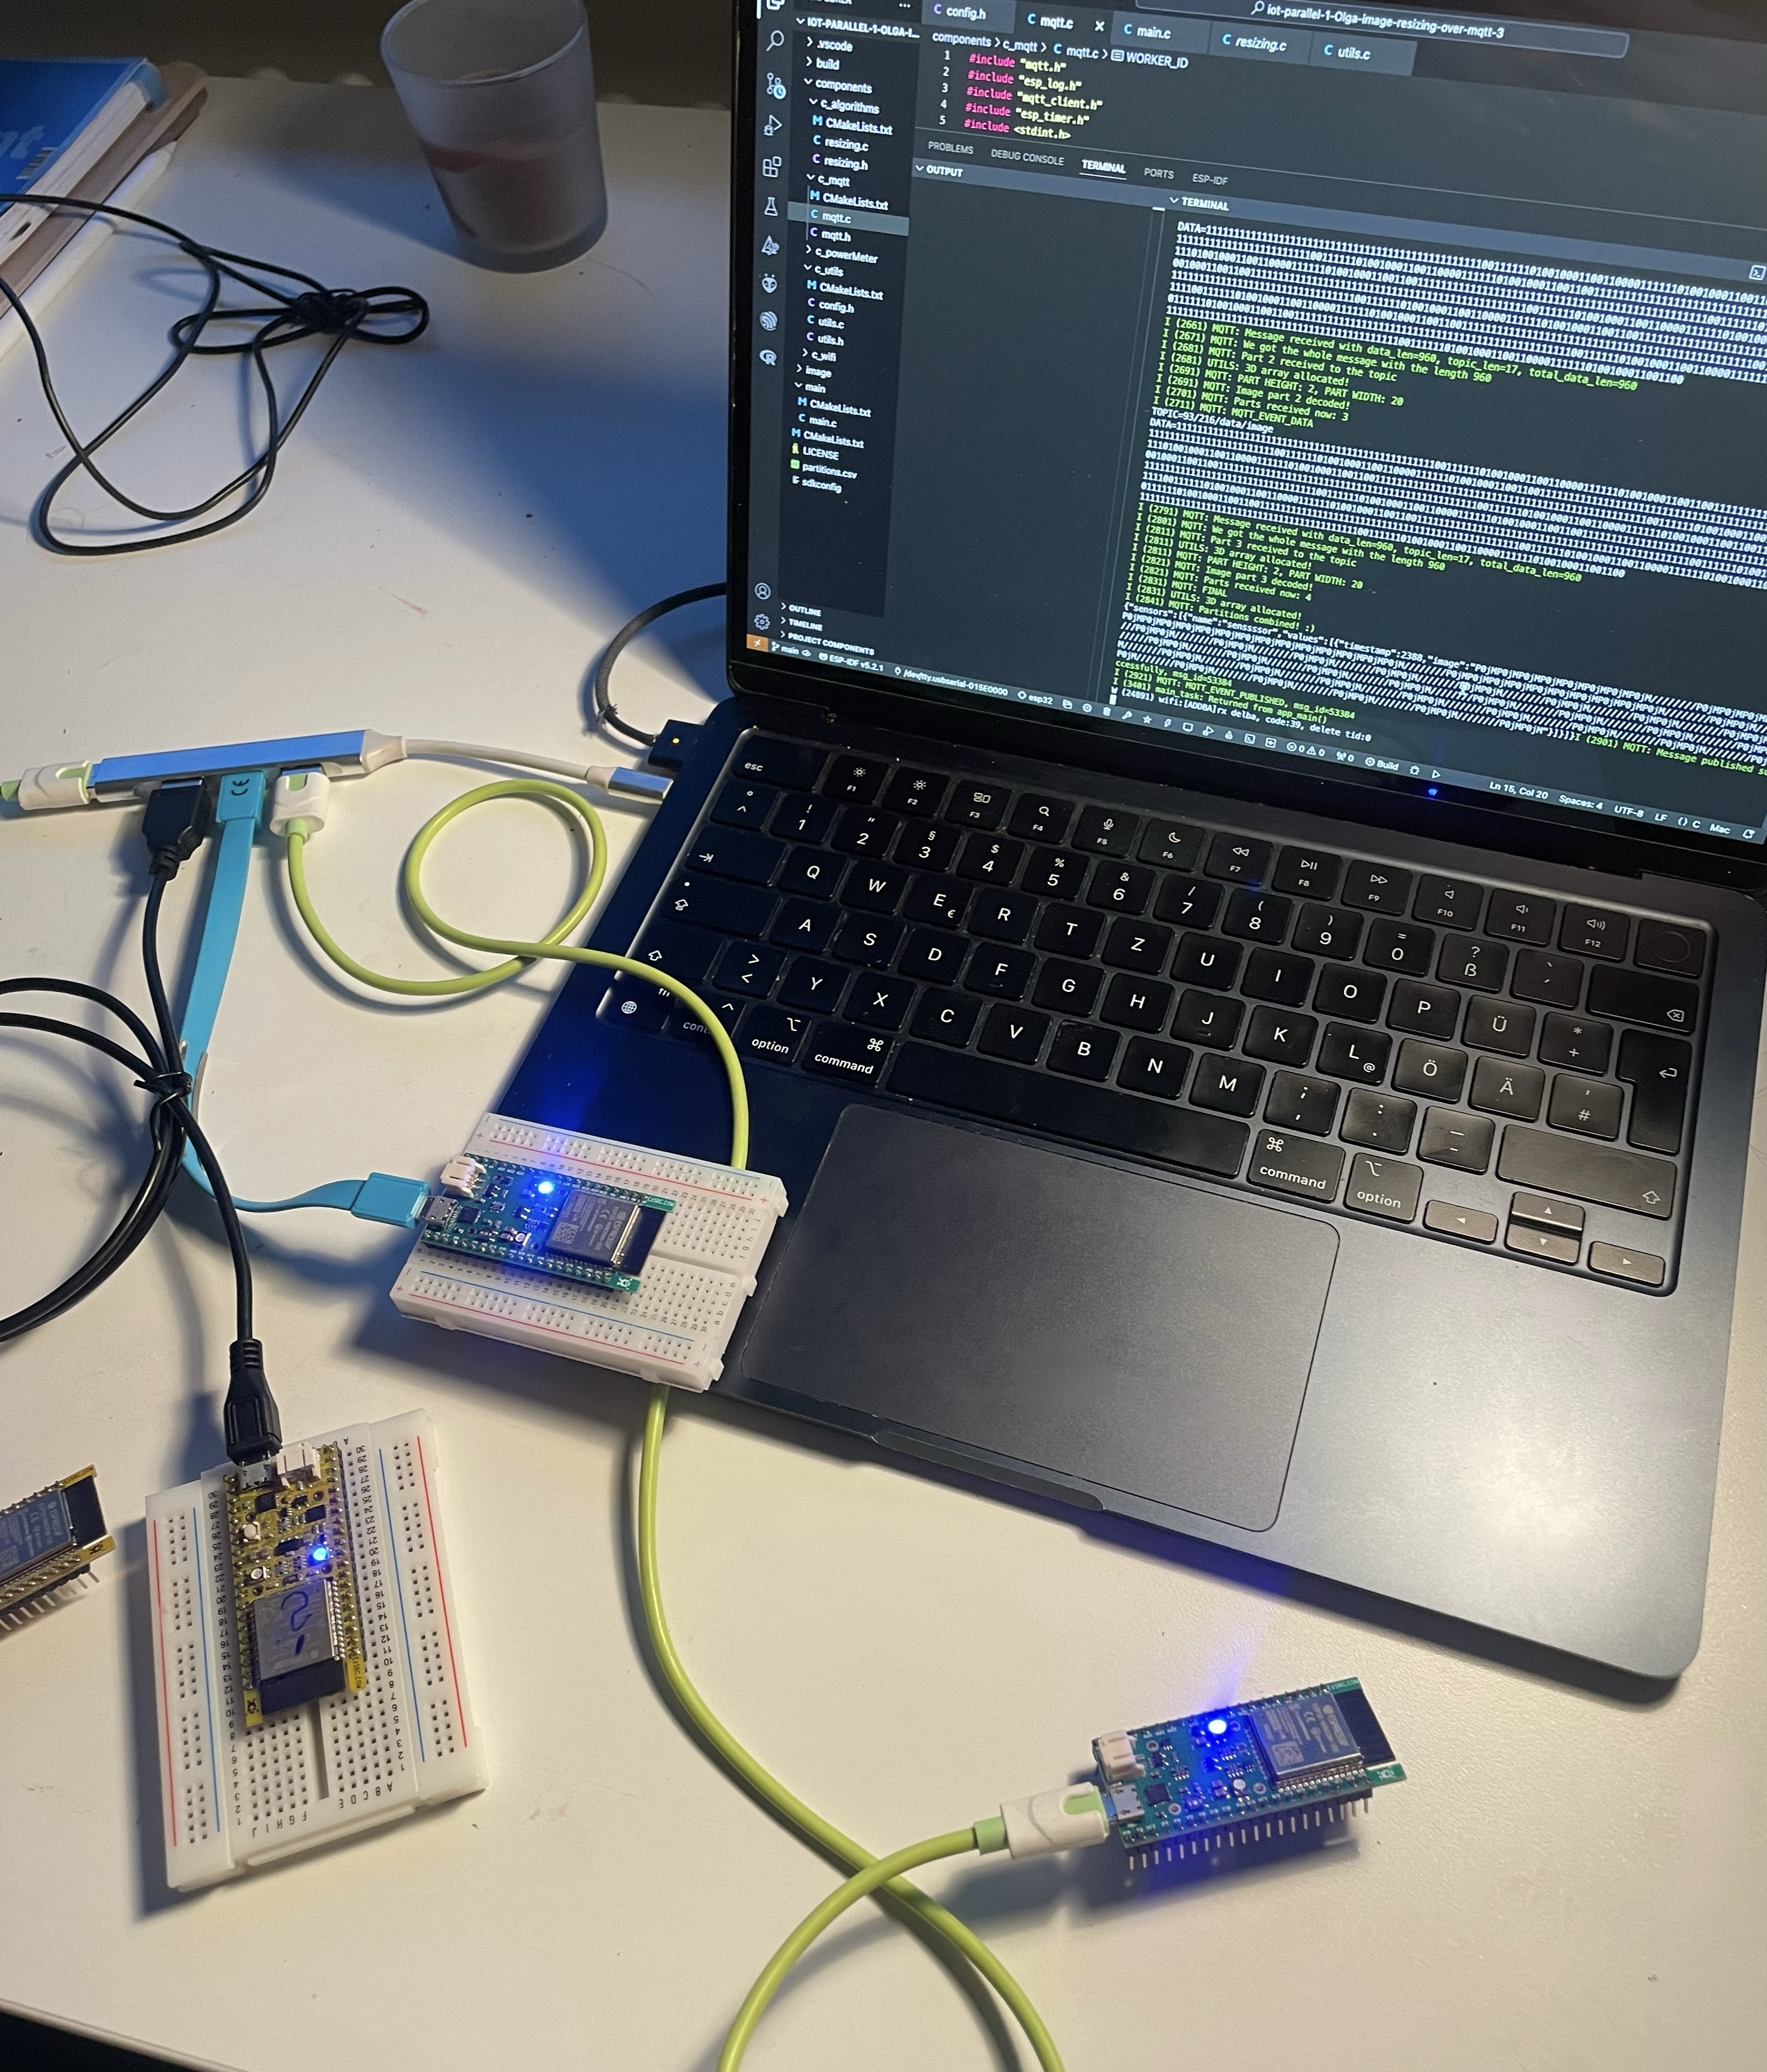
The Final Project: Distributed Image Resizer on Microcontrollers
After the initial bootcamp phase, we were given our final mission for the remaining two months: Build a distributed system using five ESP32 controllers that could resize images using a fork-join model.
Here's how it worked:
- One ESP32 acted as the main node. It received a raw image, partitioned it into chunks (by pixels), and encrypted each piece.
- The image chunks were sent to four slave nodes — each responsible for resizing one part of the image.
- Each slave node:
- Decrypted its chunk
- Performed the resizing (working with raw pixel data on constrained hardware)
- Re-encrypted the result
- Sent it back to the main node
- The main node:
- Decrypted the resized pieces
- Carefully reassembled them in the correct order
- Output the final resized image
It felt like building a tiny custom GPU from scratch using only microcontrollers, C, and a lot of debugging.
The biggest challenge was fitting everything into the ESP32's limited memory. Each controller has only 520 KB of SRAM and flash limitations that make you think differently about even the most basic operations. We had to carefully manage buffer sizes, synchronize node timing, and optimize data handling to avoid corrupt output or overload.
In the end, we got it working. We were able to resize a 780×860 image to half its size in about 10 seconds using this distributed system. Getting there wasn't easy. We ran into memory crashes, synchronization issues, broken packets, and a whole mess of image artifacts. But we solved each issue one by one, and made it work.
Thinking of Doing the Same? Here's What Helped Me
If you're curious about building hardware as a software person, here's what actually worked:
- Sounds obvious, but don't wait to "feel ready". Just start. Buy one microcontroller and do something basic. You'll pick things up quickly.
- I can definitely recommend using the ESP32 controller, it's magic. It has built-in Wi-Fi and Bluetooth, supports Arduino and C++/C SDKs, and it's incredibly well-documented.
- Start with simple projects. Even blinking an LED with a button gives you the thrill of real-world feedback from your code.
- Use PlatformIO or Arduino IDE. They make development and flashing easy, especially if you're used to software IDEs.
- Documentation is your best friend. Seriously, reading datasheets and examples is underrated, it's where all the answers hide. Especially if you work with espressif chips.
Afterward
That whole experience flipped a switch in my head. I started to really enjoy building hardware. I found myself scrolling Amazon for sensors and modules like it was Pinterest.
I ended up ordering a ESP32-C6-DevKitC which is a great tool for building your own smart home system. I never thought I'd say this, but I'm actually working on automating my apartment now. Me. Automating my apartment. Who would've thought?
If you've ever felt like hardware is too far from your world, trust me - it isn't. You can just start. And you'll be amazed at how quickly it stops feeling hard.